
Hosting an event, start to finish

1. Sign in
Go to app.teufli.com/login and enter your email. Teufli sends a magic link, so there's no password to remember. Click the link and you're signed in for 24 hours.
2. Create your event
From your events page, start a new event and fill in the title, date and time, and location. Add a description, or use the event website editor to write something richer. A template is available if you'd rather start from one. The event is a private draft until you publish it.
3. Invite your guests
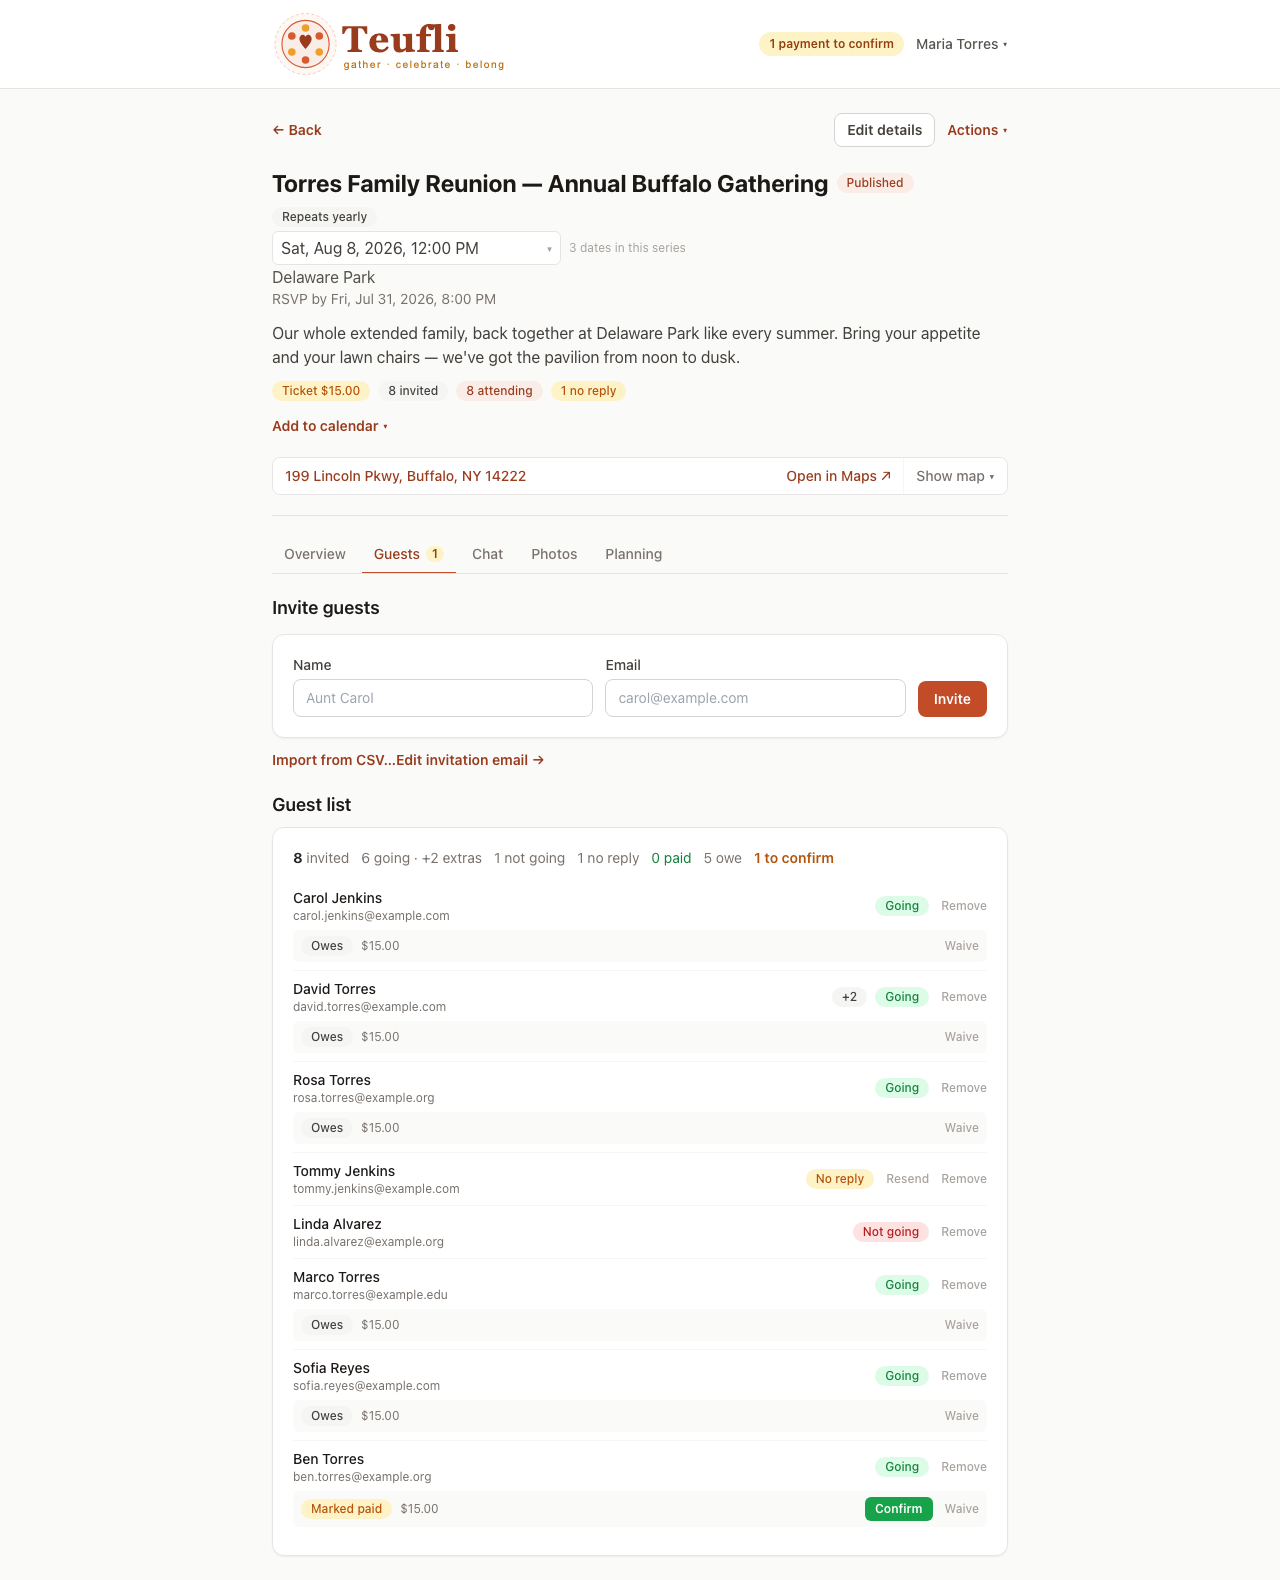
Add guests one at a time, or import a CSV of names and email addresses if your list is long. Each guest gets their own invite email with a private RSVP link, so they don't need a Teufli account to use it.
4. Publish
Publishing sends the invites and makes the event live. If you're not ready yet, leave it as a draft and come back later.
5. Track RSVPs and coordinate
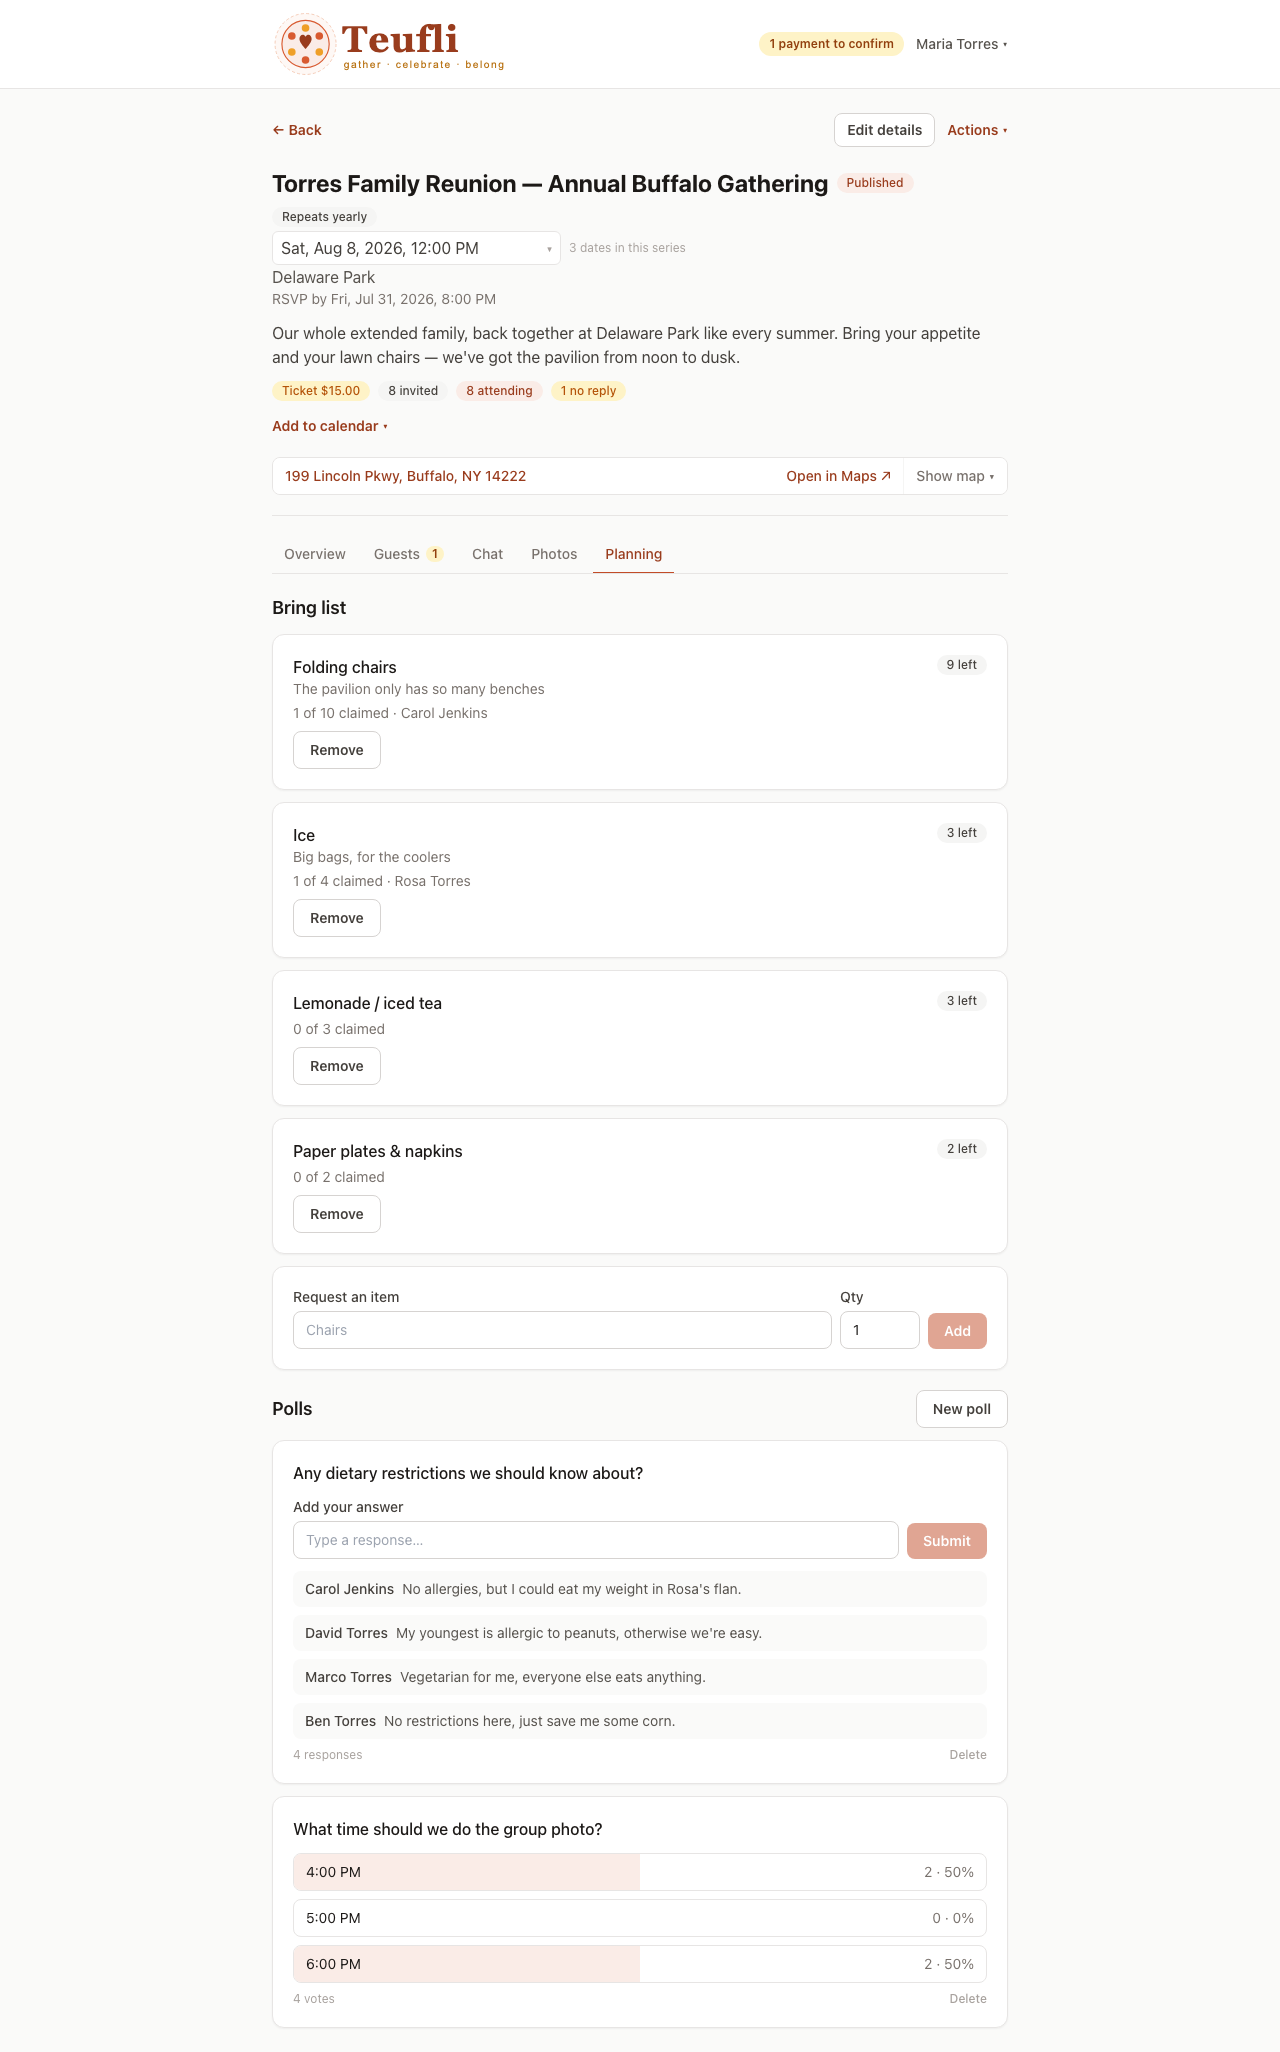
Watch responses come in from your guest list. Use the group thread for updates, post a poll if you need the group to decide something, add items to a bring list for a potluck, and upload photos as the event approaches (or after it happens).
6. Send reminders
Schedule reminders for guests who haven't responded, or as the date approaches. Guests get them by email, and by text if they've opted in.
7. Handle payment, if it's a paid event
Add a Venmo, PayPal, CashApp, or Zelle handle to the event. Guests send payment directly through that service and mark it as sent; you confirm you actually received it. See the payments walkthrough for the full flow.
Ready to try it?
Log in to Teufli